Your kitchen cabinets hold more than pots and pans. They hold the difference between a kitchen that flows and one that frustrates you every single morning. Most kitchen storage problems aren’t a space problem. They’re an organization problem. The right system turns a chaotic cabinet into something that works without you even thinking about it.
This guide covers every major cabinet zone in your kitchen. You’ll learn which tools and systems work best for each area, how to group items by function, and how to stop losing things in the back of deep cabinets forever.
Key Takeaways
- Zone-based organization is the foundation — group items by where and how you use them, not just by category.
- Drawer dividers eliminate the junk drawer problem and make utensils, cutlery, and tools instantly findable.
- Turntables (lazy Susans) solve deep corner cabinet problems by bringing items to you instead of making you dig.
- Under-sink cabinets need vertical thinking — use tiered shelves, tension rods, and door-mounted organizers to triple usable space.
- Pull-out shelves and risers transform deep base cabinets from black holes into efficient storage zones.
- Consistency beats perfection — a simple system you maintain beats an elaborate one you abandon after two weeks.
What Is the Cabinet Zone Method and Why Does It Work?
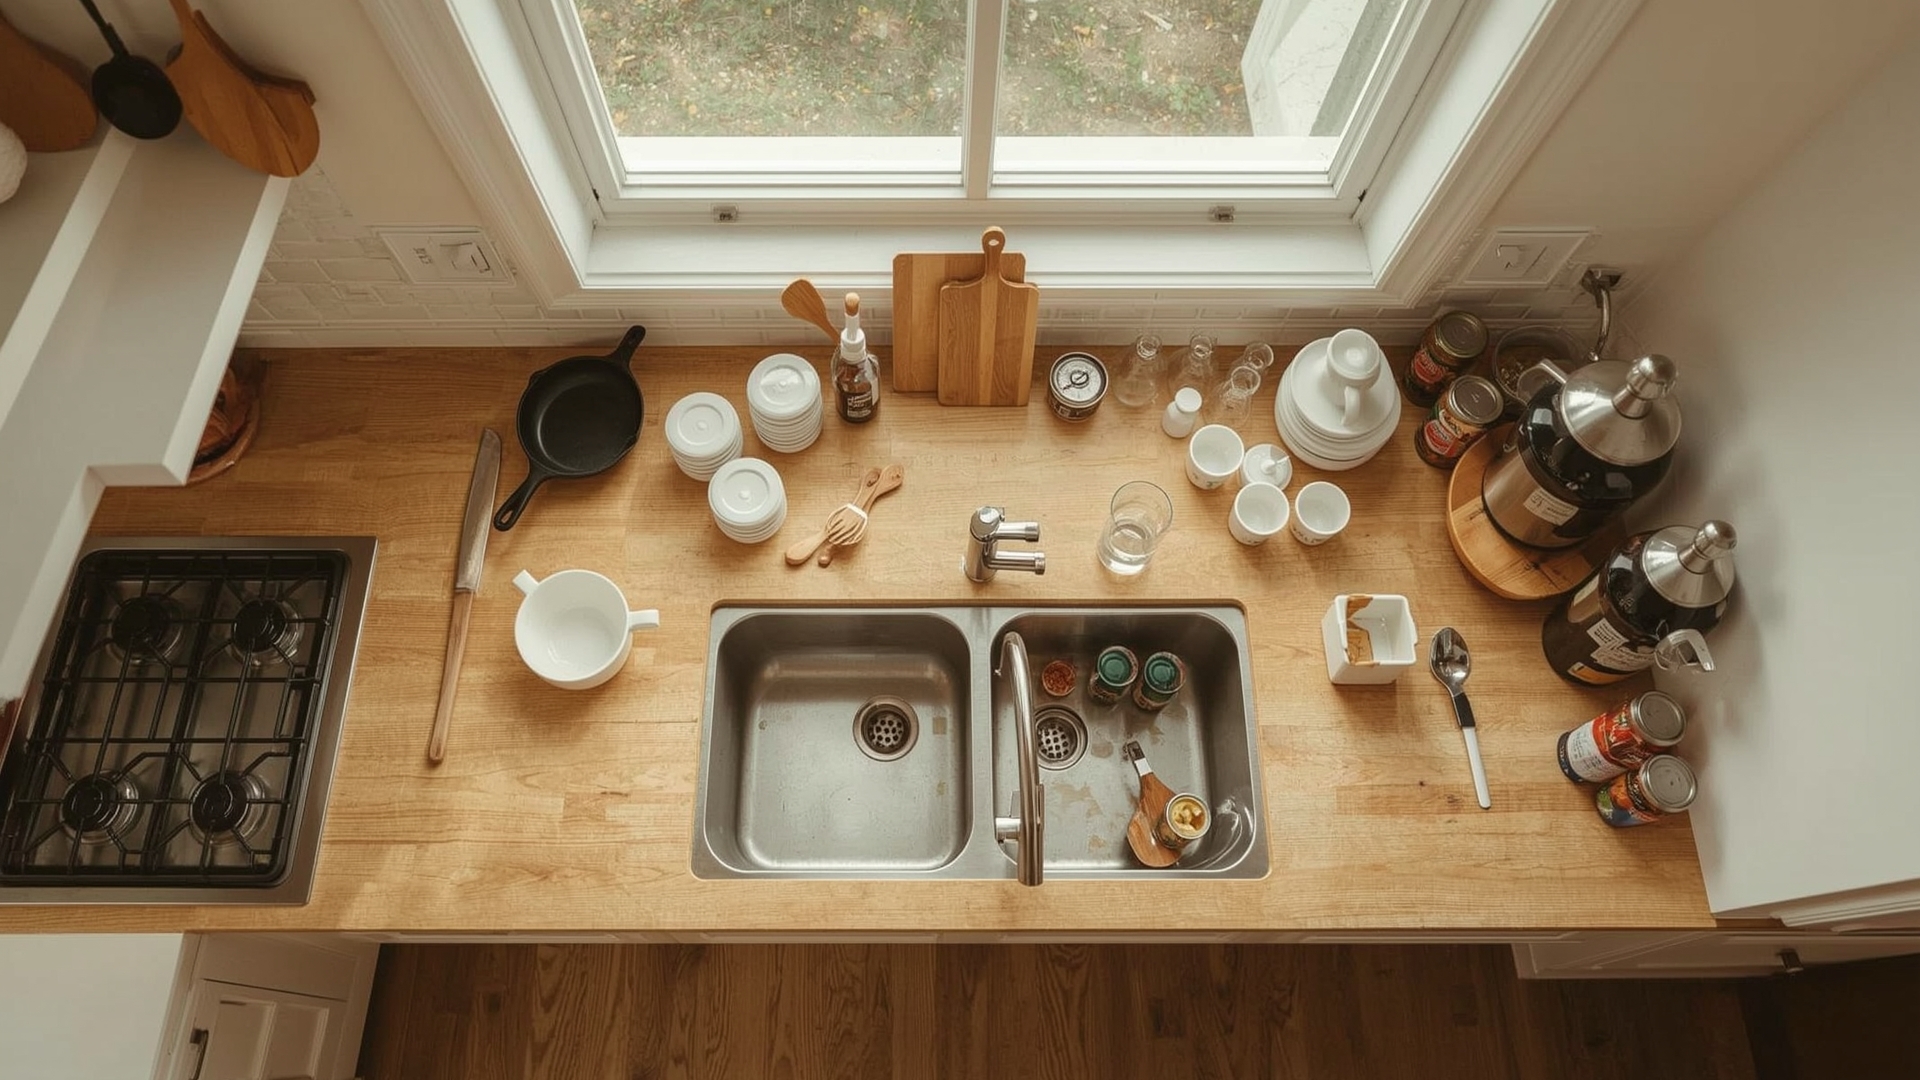
Quick Answer: The cabinet zone method means grouping items by where you use them in the kitchen. Cooking tools go near the stove, glasses near the sink, snacks near the counter. It cuts prep time and eliminates searching for things mid-cook.
Professional kitchens run on zones. Home kitchens work better when they do too. The idea is simple: store things close to where you use them. This sounds obvious, but most home kitchens were set up once and never reconsidered.
Think about your typical morning or dinner prep. You move between the fridge, counter, stove, and sink. Every time you have to cross the kitchen to grab a tool, that’s friction. Zones reduce friction by keeping related items within arm’s reach of where they’re actually used.
The Four Core Kitchen Cabinet Zones
- Cooking Zone: Cabinets near the stove. Store pots, pans, lids, cooking utensils, oils, and spices here.
- Prep Zone: Cabinets near the counter or island. Store cutting boards, mixing bowls, measuring cups, and food storage containers here.
- Clean-Up Zone: Cabinets near the sink and dishwasher. Store dish soap, sponges, cleaning supplies, and everyday dishes here.
- Food and Snack Zone: Cabinets away from heat, ideally near the pantry. Store dry goods, canned items, snacks, and baking supplies here.
Once you define your zones, everything else gets easier. You’re not organizing randomly. You’re building a kitchen that matches the way you actually move through it.
How Should You Organize Kitchen Drawers?
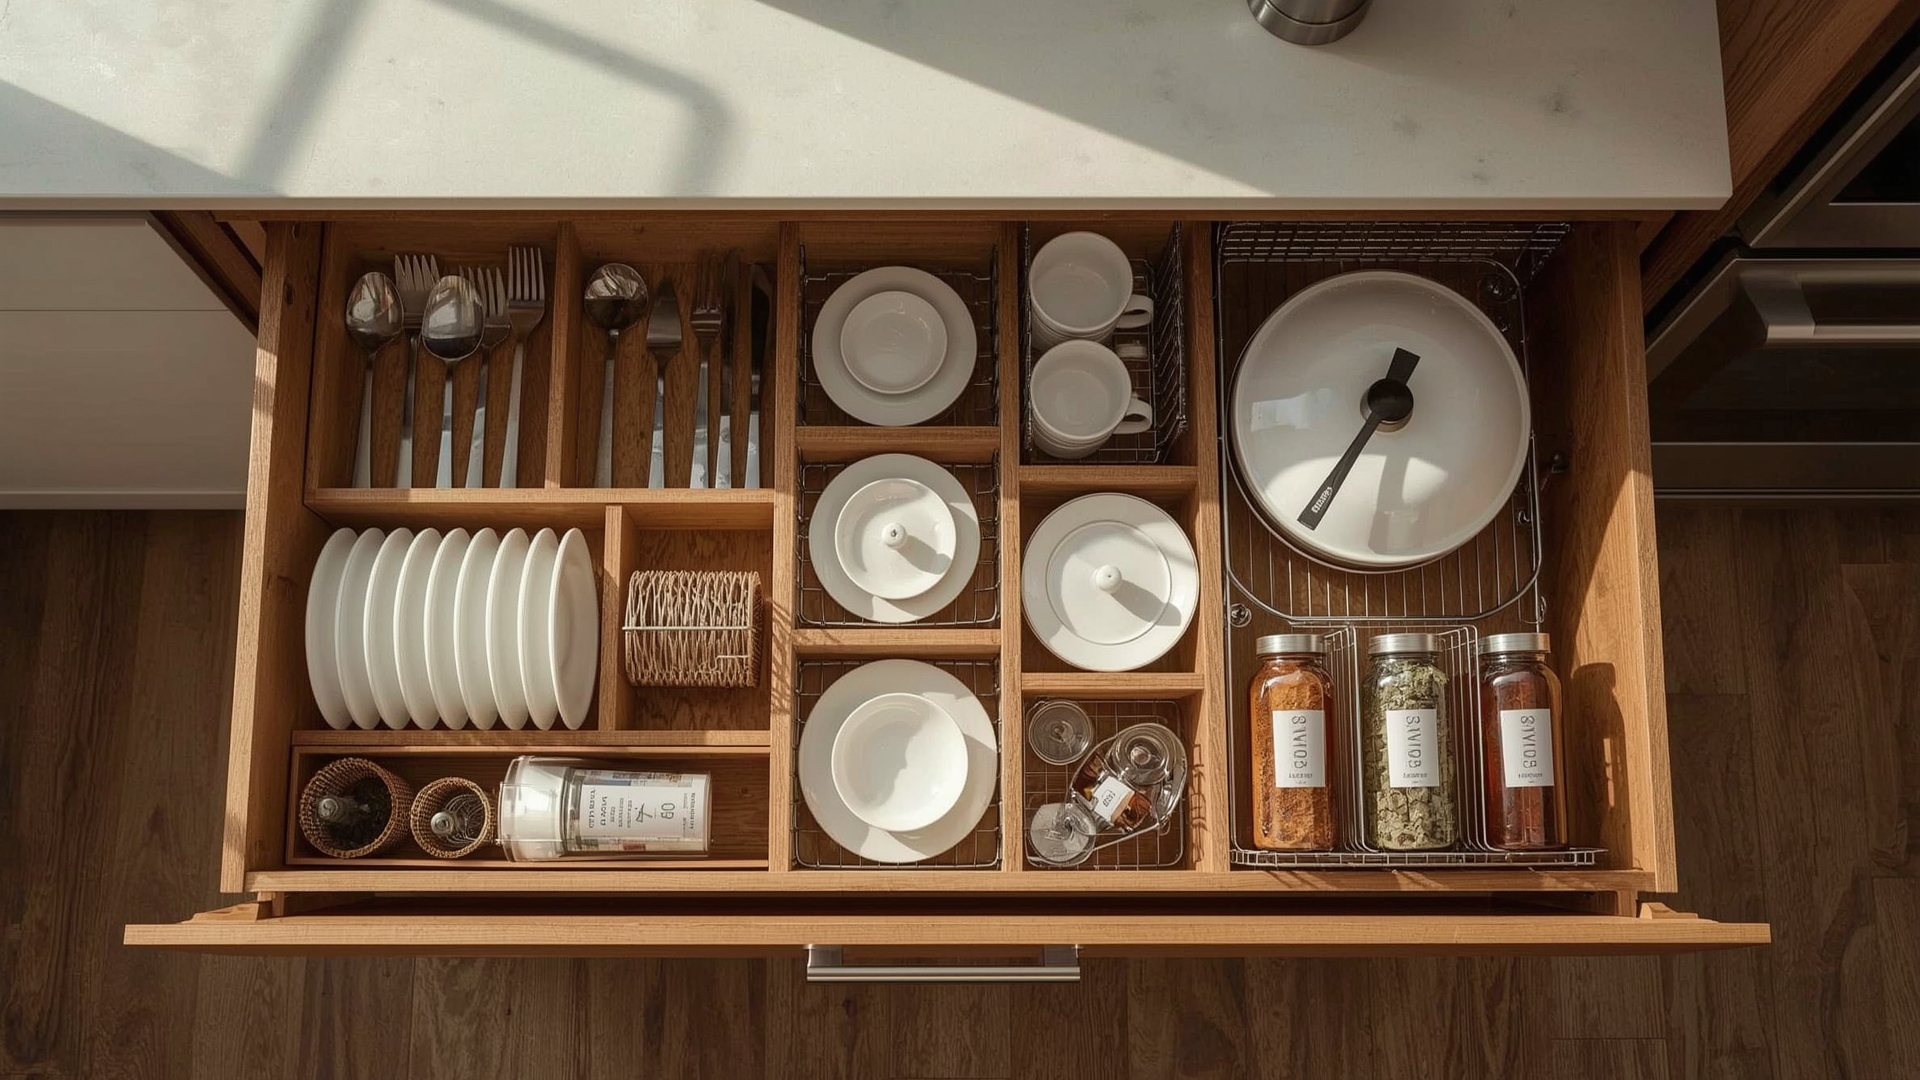
Quick Answer: Use drawer dividers to separate cutlery, cooking tools, and small items into dedicated slots. Assign one purpose per drawer. A utensil drawer, a cutlery drawer, and a tools drawer each outperform one overloaded “everything” drawer.
Drawers are the most underused storage space in most kitchens. Most people have one or two functional drawers and one disaster drawer. That changes with the right dividers and a clear system.
Types of Drawer Dividers and What They Work Best For
| Divider Type | Best For | Adjustable | Avg. Price Range | Material |
|---|---|---|---|---|
| Expandable bamboo tray | Cutlery and small utensils | Yes | $15–$35 | Bamboo |
| Interlocking plastic dividers | Deep drawers, custom layouts | Yes | $10–$25 | BPA-free plastic |
| Peg-and-rail systems | Kitchen tools, gadgets, lids | Yes | $30–$60 | Wood with metal pegs |
| Fixed-slot knife block insert | In-drawer knife storage | No | $20–$45 | Bamboo or acacia wood |
| Spice drawer insert | Angled spice storage in drawers | No | $18–$40 | Bamboo or plastic |
How to Set Up a Cutlery Drawer That Stays Organized
Start by pulling everything out of the drawer. Sort items into three groups: cutlery (forks, knives, spoons), cooking tools (spatulas, ladles, tongs), and miscellaneous small items. Give each group its own drawer if you have the space.
If you only have one drawer for everything, use a divider that puts cutlery at the front and longer tools along the back. Avoid stacking items on top of each other. If something doesn’t have a dedicated slot, it probably doesn’t belong in the drawer.
The Junk Drawer Fix
Every kitchen has a junk drawer. It doesn’t need to disappear. It needs rules. Use a divided organizer with labeled sections: batteries, rubber bands, tape, pens, takeout menus. When every category has a home, the drawer stays manageable. When items have no category, they pile up and take over.
What Is a Lazy Susan and Where Should You Use It in Cabinets?
Quick Answer: A lazy Susan is a rotating turntable that sits inside a cabinet or on a shelf. Spinning it brings items in the back forward. It works best in corner cabinets, deep base cabinets, and upper cabinets storing spices, condiments, or canned goods.
Corner cabinets are the most wasted space in most kitchens. They’re deep, awkward, and hard to reach into without practically climbing inside. A lazy Susan fixes this by turning the corner into accessible rotating storage.
Lazy Susan Types and Where Each One Works
| Lazy Susan Type | Best Cabinet Location | Diameter Range | Weight Capacity | Avg. Price Range |
|---|---|---|---|---|
| Full-circle turntable | Corner base cabinets | 18–32 inches | Up to 50 lbs | $25–$80 |
| Two-tier turntable | Upper cabinets, pantry shelves | 10–16 inches | Up to 20 lbs per tier | $15–$40 |
| D-shaped (half-moon) shelf | Blind corner base cabinets | Fits 33–36 inch cabinets | Up to 30 lbs per shelf | $60–$180 |
| Pull-out kidney-shaped shelf | Blind corner upper cabinets | Fits 24–36 inch openings | Up to 25 lbs | $80–$200 |
| Small countertop turntable | Inside upper cabinets for spices | 6–10 inches | Up to 10 lbs | $8–$20 |
How to Get the Most Out of Corner Cabinet Turntables
Measure your cabinet’s interior depth and width before buying. Most corner base cabinets need a 28- to 32-inch lazy Susan to fit properly without wobbling. Group items by frequency of use. Daily items go on the front half of the turntable. Less-used items go to the back.
For upper corner cabinets, a two-tier turntable stacks spices, oils, and small jars efficiently. Label the tops of jars so you can see them at a glance without picking each one up.
How Do You Organize Deep Base Cabinets?
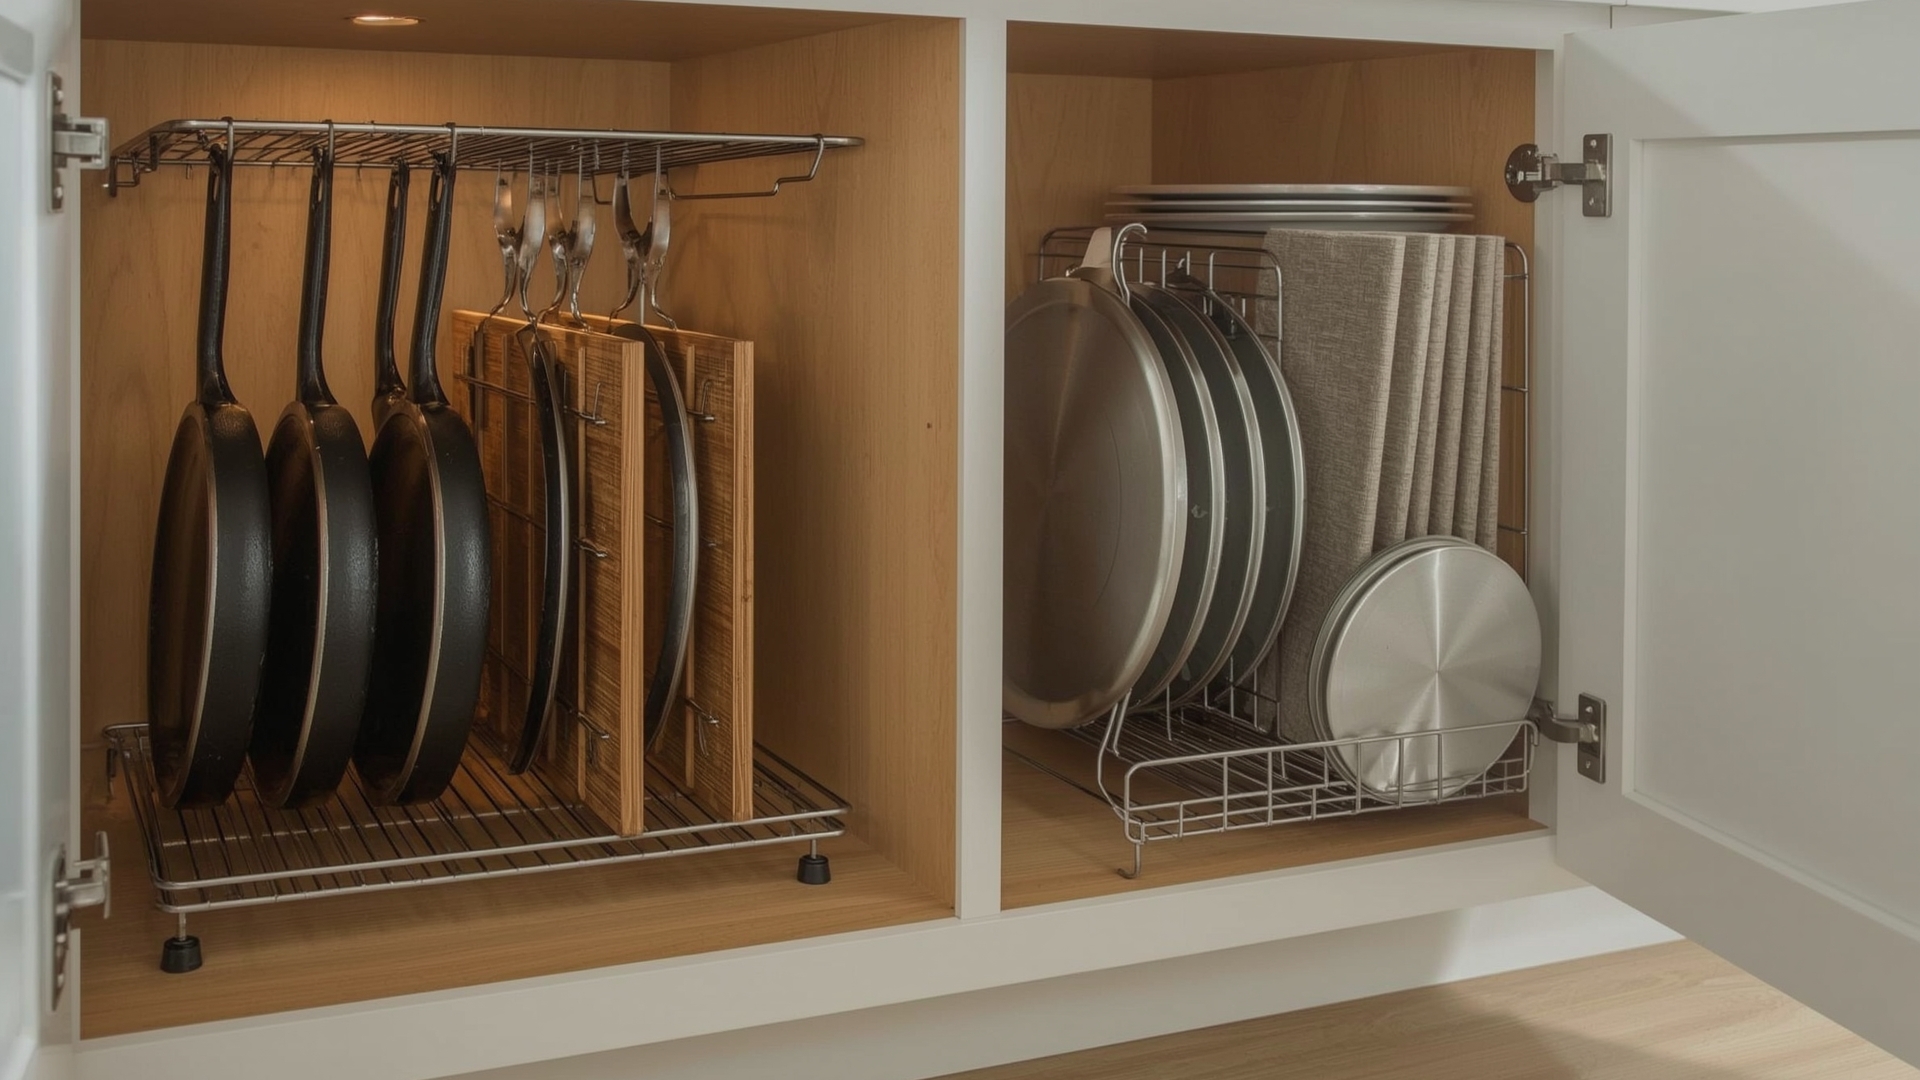
Quick Answer: Deep base cabinets need pull-out shelves, risers, or roll-out drawers to use the back half effectively. Without these, the back 12 inches become dead space. Stackable risers work for pans and lids, while pull-out baskets work for pots and appliances.
Base cabinets are tall and deep, which sounds great until you realize most people only use the front third. Everything else gets pushed to the back and forgotten. The fix is creating layers and pull-out access.
Best Tools for Deep Base Cabinet Organization
| Tool | Best For | Install Type | Avg. Price Range | Space Gained |
|---|---|---|---|---|
| Pull-out cabinet shelf | Pots, pans, appliances | Screwed to cabinet floor | $30–$90 | Accesses full depth |
| Stackable pan organizer | Baking sheets, cutting boards | Freestanding | $15–$35 | Vertical stack of 6–8 items |
| Lid organizer (vertical) | Pot and pan lids | Freestanding | $10–$25 | Holds 6–10 lids upright |
| Wire pull-out basket | Produce, canned goods, snacks | Slide-in or screwed | $20–$55 | Full shelf depth access |
| Two-tier cabinet riser | Plates, bowls, small appliances | Freestanding | $12–$30 | Doubles front-to-back layers |
How to Store Pots, Pans, and Lids Without the Chaos
Lids are the main source of cabinet chaos. They don’t stack well, they slide around, and they’re always the one thing you can’t find when you’re in a hurry. A vertical lid organizer — a freestanding rack that holds lids upright like files in a folder — solves this completely.
For pans, nest them by size and store them vertically in a stackable organizer rather than stacking flat. Stacking flat means lifting heavy pans every time you need the bottom one. Vertical storage means pulling one out without moving the others.
Organizing a Cabinet for Pots: Nesting vs. Vertical Storage
Nesting works for pots with the same shape. Stack largest to smallest, putting lids in a separate rack. For pans with different shapes — skillets, sauté pans, cast iron — vertical storage with dividers between them is faster and easier on the cookware surface.
How Do You Maximize Upper Cabinet Storage?
Quick Answer: Upper cabinets work best for everyday dishes, glasses, and lighter items. Add shelf risers to double usable shelf levels, use cabinet door organizers for spices or wrap, and store items based on height frequency — daily use at eye level, rarely used items above.
Upper cabinets suffer from two problems: things get pushed to the back of shelves, and the vertical space between shelves gets wasted. Both are easy to fix.
Using Shelf Risers to Double Your Space
A shelf riser sits inside an existing shelf and creates a second level. Stack plates or bowls on the bottom. Store mugs or glasses on the raised tier. A typical 12-inch-deep upper cabinet shelf can fit two tiers of items with a 4- to 6-inch riser.
This works especially well for cups and mugs, which are light enough to store on an upper shelf and short enough to stack in two rows without the cabinet feeling cramped.
What to Store in Upper Cabinets (and What to Move Out)
- Keep in upper cabinets: Everyday plates and bowls, glasses and mugs, spices (if near the stove), storage containers, dry goods like cereals or oats
- Move out of upper cabinets: Heavy appliances, large pots, bulk items, anything used less than once a month
Cabinet Door Organizers for Upper Cabinets
The inside of cabinet doors is free real estate. Mount a small wire rack or over-door organizer on the inside of an upper cabinet door to store spice packets, measuring spoons, or plastic wrap. These organizers typically hold 5 to 15 pounds and cost between $8 and $25.
How Do You Organize the Cabinet Under the Kitchen Sink?
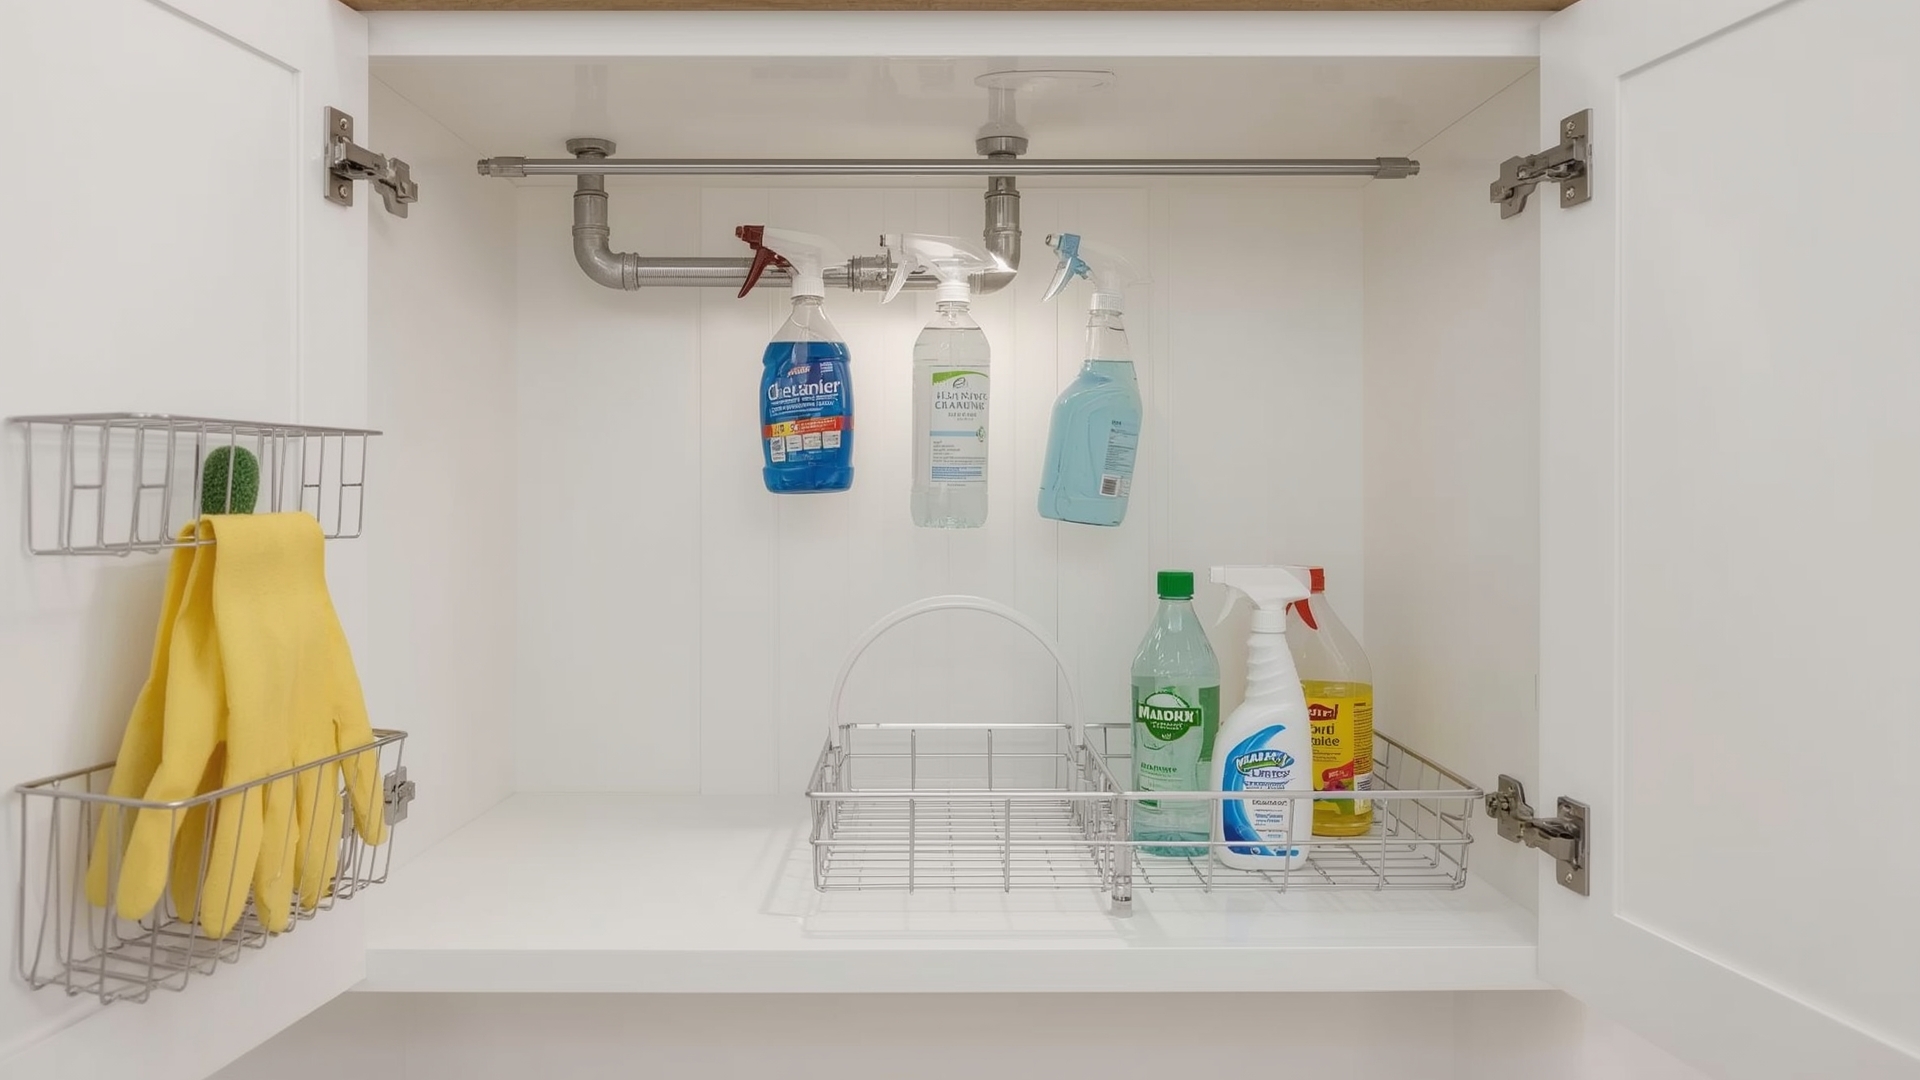
Quick Answer: Under-sink cabinets are awkward because of the plumbing. Use tiered shelves to work around pipes, tension rods to hang spray bottles, and door-mounted organizers for sponges and gloves. Group cleaning products by task: daily surface cleaners, deep cleaners, and dish supplies.
The under-sink cabinet is one of the most neglected spaces in any kitchen. It’s usually a dump zone for cleaning products and spare sponges, with no real system behind it. The plumbing running through it makes a standard shelf impossible, but there are tools built specifically for this space.
Under-Sink Organization Tools That Work Around Plumbing
| Tool | Function | Works Around Pipes | Avg. Price Range | Weight Capacity |
|---|---|---|---|---|
| U-shaped shelf riser | Creates a second level above pipes | Yes (U-shape fits over pipes) | $15–$35 | 20–35 lbs |
| Tension rod | Hang spray bottles by their trigger | Yes | $5–$15 | 10–20 lbs |
| Stackable pull-out drawers | Organize small items in layers | Partial (depends on pipe location) | $20–$50 | 15–25 lbs per drawer |
| Door-mounted organizer | Sponges, gloves, scrubbers | Yes (on door, not shelf) | $10–$25 | 5–10 lbs |
| Cleaning caddy with handle | Portable product grouping | Yes (freestanding) | $8–$20 | 15–20 lbs |
How to Group Cleaning Products Under the Sink
Divide your under-sink products into three groups: daily cleaners (dish soap, surface spray, sponges), deep cleaners (degreasers, scrubs, drain cleaner), and supplies (rubber gloves, trash bags, extra sponges). Keep daily items at the front. Store deep cleaners and backstock at the back or on the upper shelf riser.
A portable cleaning caddy is worth considering if you clean multiple rooms. Store it under the sink, grab it when you need it, and return it when you’re done. It keeps products together and cuts down on the number of trips between rooms.
Under-Sink Safety: Keeping Chemicals Away From Kids
If you have young children at home, add a child safety latch to the under-sink cabinet. These cost between $5 and $15 and install with adhesive or a small screw. It takes 15 minutes to install and removes a real hazard. Store any hazardous products — bleach, drain cleaner, oven cleaner — on the upper shelf or behind the latch where children can’t reach them easily.
How Do You Organize a Cabinet for Food Storage Containers?
Quick Answer: Store containers with lids attached when possible, or use a vertical lid organizer to keep lids separate. Nest containers by size and material. Dedicate one full cabinet or drawer section to containers only — mixing them with other items causes the pile-up problem most kitchens struggle with.
Food storage containers are one of the most common sources of cabinet chaos. They come in different shapes, sizes, and materials. Lids go missing. Containers get buried. You end up pulling everything out to find the right lid for the right container.
The Matching System That Eliminates Lid Chaos
Start by pairing every container with its lid. If a lid has no container, get rid of it. If a container has no lid, assess whether it has another use. If not, remove it. A container without a matching lid is clutter.
Then choose a storage method. Nesting containers together (lids stored separately in a vertical rack) saves the most space. Storing containers with lids attached takes more room but is faster to use. Choose based on how much space you have.
Glass vs. Plastic Food Storage Containers: Which to Organize Differently
Glass containers are heavier and can’t be nested as tightly. Store them on a base cabinet shelf with lids nested inside each container. Plastic containers are lighter and can stack tightly. Use a drawer or upper cabinet shelf, nesting by size with a separate lid rack.
How Do You Organize a Spice Cabinet or Spice Drawer?
Quick Answer: Alphabetical order works for large spice collections. Frequency of use works better for smaller ones. Use uniform jars, label the lids for top-view visibility, and choose a tiered shelf or spice drawer insert so every jar is visible at once without moving anything.
Spices are small, numerous, and easy to lose track of. The biggest problem isn’t storage — it’s visibility. If you can’t see a spice, you either buy a duplicate or you skip it in your cooking entirely.
Spice Organization Systems Side by Side
- Alphabetical: Works for 30+ spices. Fast to find, but requires knowing the name. Labels must be visible from above.
- By cuisine: Groups Italian, Mexican, and Asian spices together. Works well if you cook distinct styles regularly.
- By frequency of use: Daily spices up front, specialty spices at the back. Best for cooks who reach for the same 8 to 10 spices most days.
- By type (herbs, salts, sweet, heat): Useful for bakers and experimental cooks. Requires more label attention.
Spice Drawer Insert vs. Tiered Shelf Organizer
A spice drawer insert holds bottles at an angle, labels facing up. You see every spice at once when you open the drawer. This is the most efficient system for kitchens with a spare shallow drawer near the stove.
A tiered shelf organizer (a step-style riser inside the cabinet) raises the back row so every jar is visible over the front row. It costs between $10 and $30 and takes under five minutes to set up. Both systems work. The drawer insert is faster to use. The tiered shelf is better if you don’t have a spare drawer.
What Are the Best Cabinet Organization Products Worth Buying?
Quick Answer: The highest-impact products are expandable drawer dividers, lazy Susan turntables, pull-out cabinet shelves, tiered shelf risers, and vertical lid organizers. These five tools alone solve 80% of common kitchen cabinet problems without a full renovation.
You don’t need to buy everything at once. Start with the one cabinet or drawer causing the most friction in your daily routine. Fix that first. Then move on.
Cabinet Organization Products by Impact and Cost
| Product | Problem It Solves | Impact Level | Avg. Price Range | Time to Set Up |
|---|---|---|---|---|
| Expandable drawer dividers | Cluttered, unorganized drawers | High | $10–$35 | 5–10 minutes |
| Two-tier lazy Susan | Inaccessible corner or deep cabinets | High | $15–$40 | 2–5 minutes |
| Pull-out cabinet shelf | Unusable back of base cabinets | High | $30–$90 | 15–30 minutes |
| Vertical lid organizer | Lid chaos in pot and pan cabinets | High | $10–$25 | 2 minutes |
| U-shaped under-sink shelf | Wasted under-sink cabinet space | High | $15–$35 | 5 minutes |
| Shelf riser for upper cabinets | Wasted vertical space between shelves | Medium-High | $12–$30 | 2 minutes |
| In-drawer spice insert | Invisible and duplicate spices | Medium | $18–$40 | 10 minutes |
| Tension rod under sink | Spray bottles taking up floor space | Medium | $5–$15 | 2 minutes |
How Do You Keep Kitchen Cabinets Organized Long Term?
Quick Answer: Long-term cabinet organization depends on three habits: returning items to their exact spot after every use, doing a 5-minute monthly reset where you straighten and remove anything that doesn’t belong, and buying new products only after deciding where they’ll live before they enter the cabinet.
The biggest mistake people make is spending a weekend getting organized and then doing nothing to maintain it. Organization isn’t a one-time event. It’s a habit built on a simple system.
The One-In-One-Out Rule for Kitchen Cabinets
Every time a new item enters your kitchen cabinet, one item leaves. Buy a new pan? Donate the old one. Add a new storage container? Get rid of the mismatched one. This rule keeps volume stable and prevents the slow creep of clutter that undoes even the best organization systems.
Monthly Cabinet Reset Checklist
- Pull everything out of one cabinet zone per session (takes 10 minutes per zone)
- Wipe down shelves and drawer bottoms
- Check for expired food or cleaning products
- Return items to their designated spots, not just “somewhere in the cabinet”
- Note anything you’re out of stock on
- Check that dividers, turntables, and risers are still seated correctly
How to Get Every Family Member on Board
Organization systems fail when they only make sense to the person who created them. Keep it visual. Label shelves, bins, and zones with a label maker or simple masking tape labels. When anyone in the household can look at a label and know where something goes, the system maintains itself.
Make it easy to put things back. If returning an item requires moving three other things, the item won’t go back correctly. Every item should have a spot it can return to in under five seconds.
Frequently Asked Questions
What is the best way to organize a small kitchen with few cabinets?
Maximize vertical space with shelf risers and wall-mounted racks. Use the inside of cabinet doors for extra storage. Keep countertops clear by moving rarely used appliances to a closet or pantry shelf. Prioritize cabinet space for daily-use items only.
Are pull-out cabinet shelves hard to install?
Most pull-out shelves mount with four screws into the cabinet floor and take 20 to 30 minutes to install. You need a screwdriver and the shelf dimensions measured before buying. No carpentry experience is needed for standard slide-in models that don’t require drilling into cabinet walls.
How do I stop my cabinet shelves from sagging under heavy pots?
Cabinet shelf sagging usually means the shelf material is too thin or the span is too wide. Replace particle board shelves with 3/4-inch plywood or solid wood for heavy loads. Adding a center shelf pin support also reduces sag on spans wider than 24 inches. Store your heaviest pots on base cabinet floors, not shelves.
What is the easiest cabinet to organize first for maximum impact?
Start with the cabinet or drawer you open most often. For most kitchens, that’s the utensil drawer or the pot and pan cabinet. Fixing the one that causes daily frustration gives you immediate relief and keeps you motivated to tackle the others.
Can I organize kitchen cabinets without buying anything?
Yes. Empty everything out, sort items by use and zone, remove anything broken or unused, and put items back in logical groupings. Reusing shoeboxes or small cardboard boxes as temporary dividers works well while you decide what permanent organizers to buy.
How long does it take to fully organize kitchen cabinets?
A full kitchen cabinet organization project takes 3 to 6 hours for an average kitchen. Tackling one zone per session — one cabinet or two drawers at a time — spreads it across a week without overwhelming you. Most people see the biggest improvement in the first two zones they organize.